Add your photos to Kura-chan
Kura-chan needs read access to your photos before it can show them, index them, or recognize faces. There are two ways.
Option 1 — Mount your fygoOS Photos library (recommended)
Section titled “Option 1 — Mount your fygoOS Photos library (recommended)”This lets Kura-chan see your whole existing fygoOS Photos library, read-only. Nothing is copied.
-
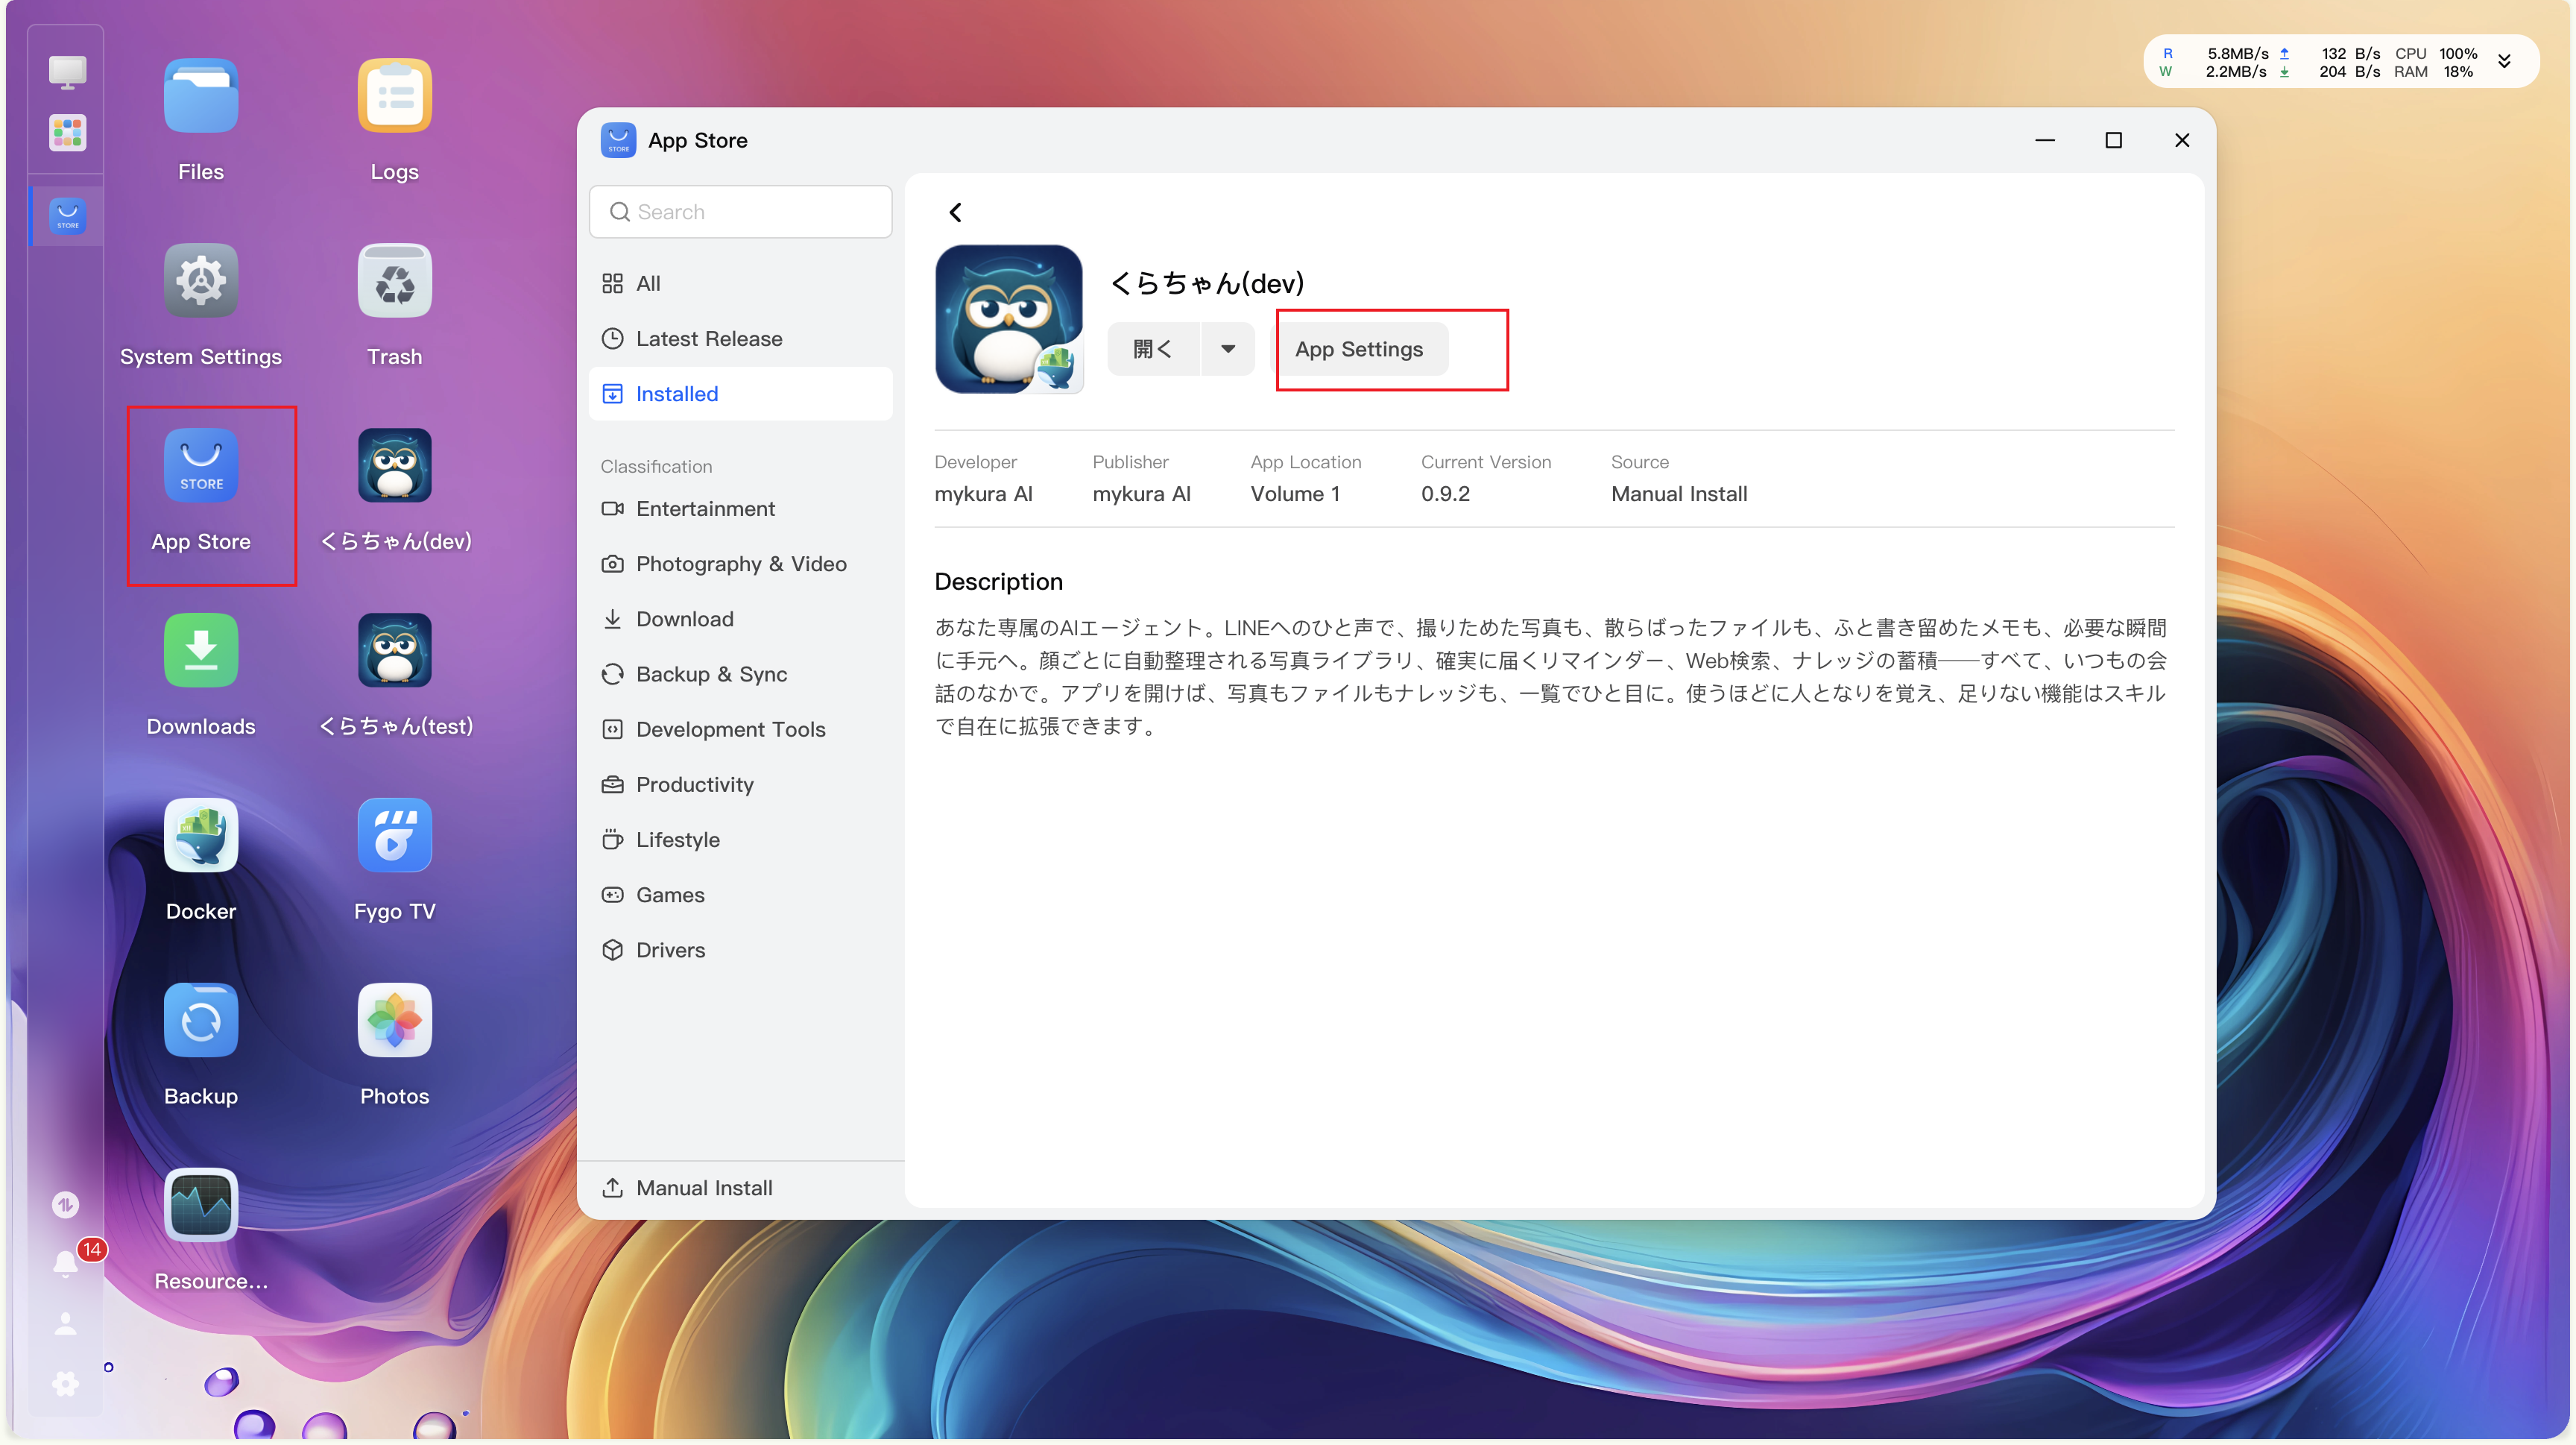
Open App Center → Installed → Kura-chan → App Settings.
-
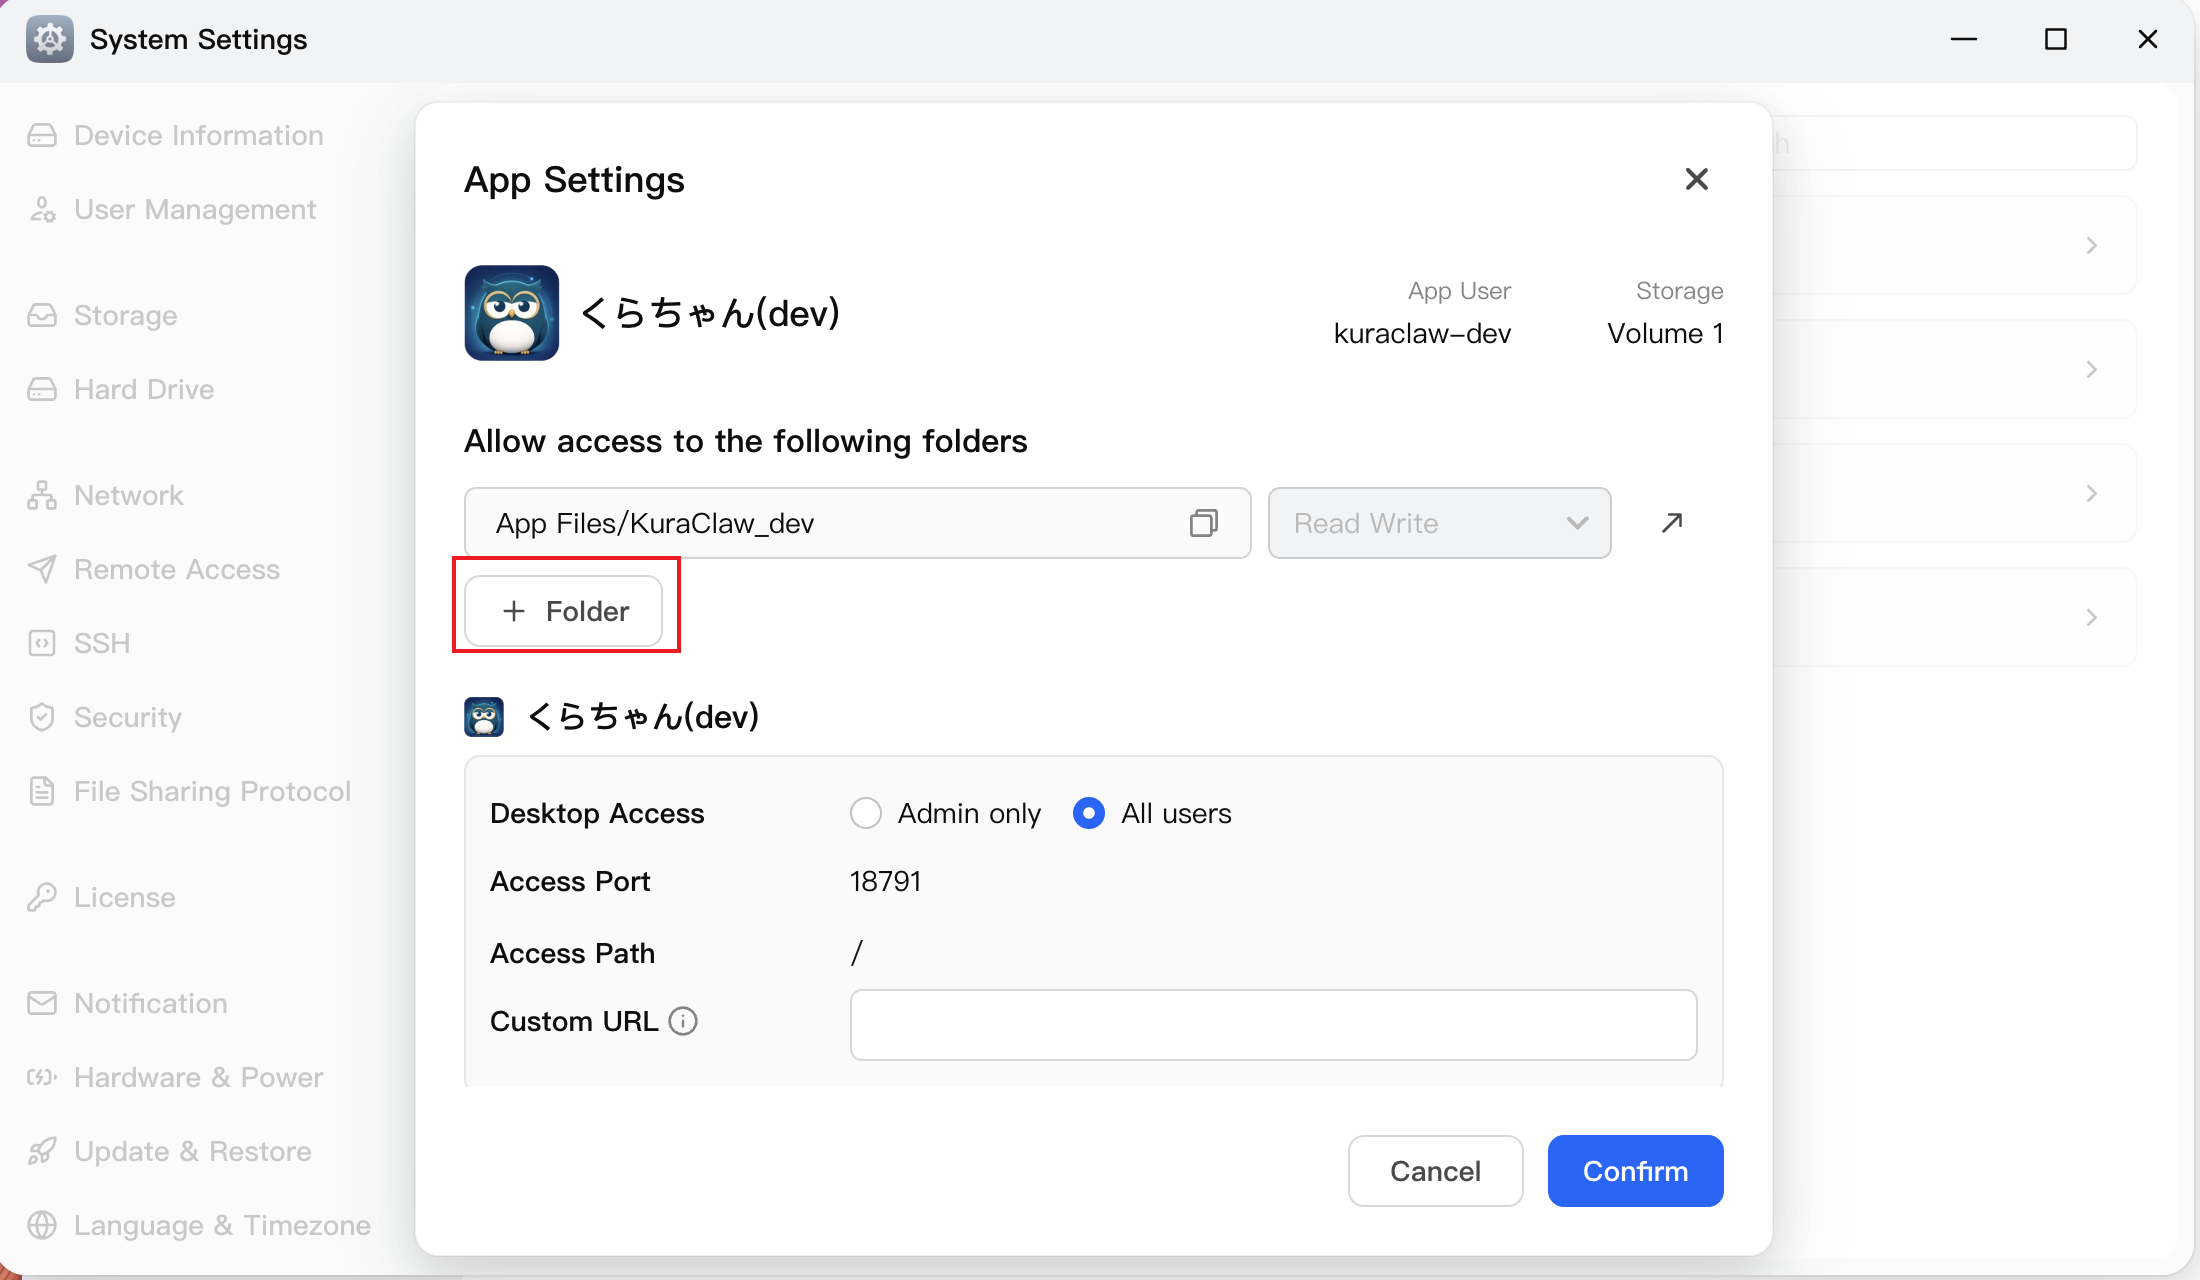
Under Allowed folders, click + Folder.
-
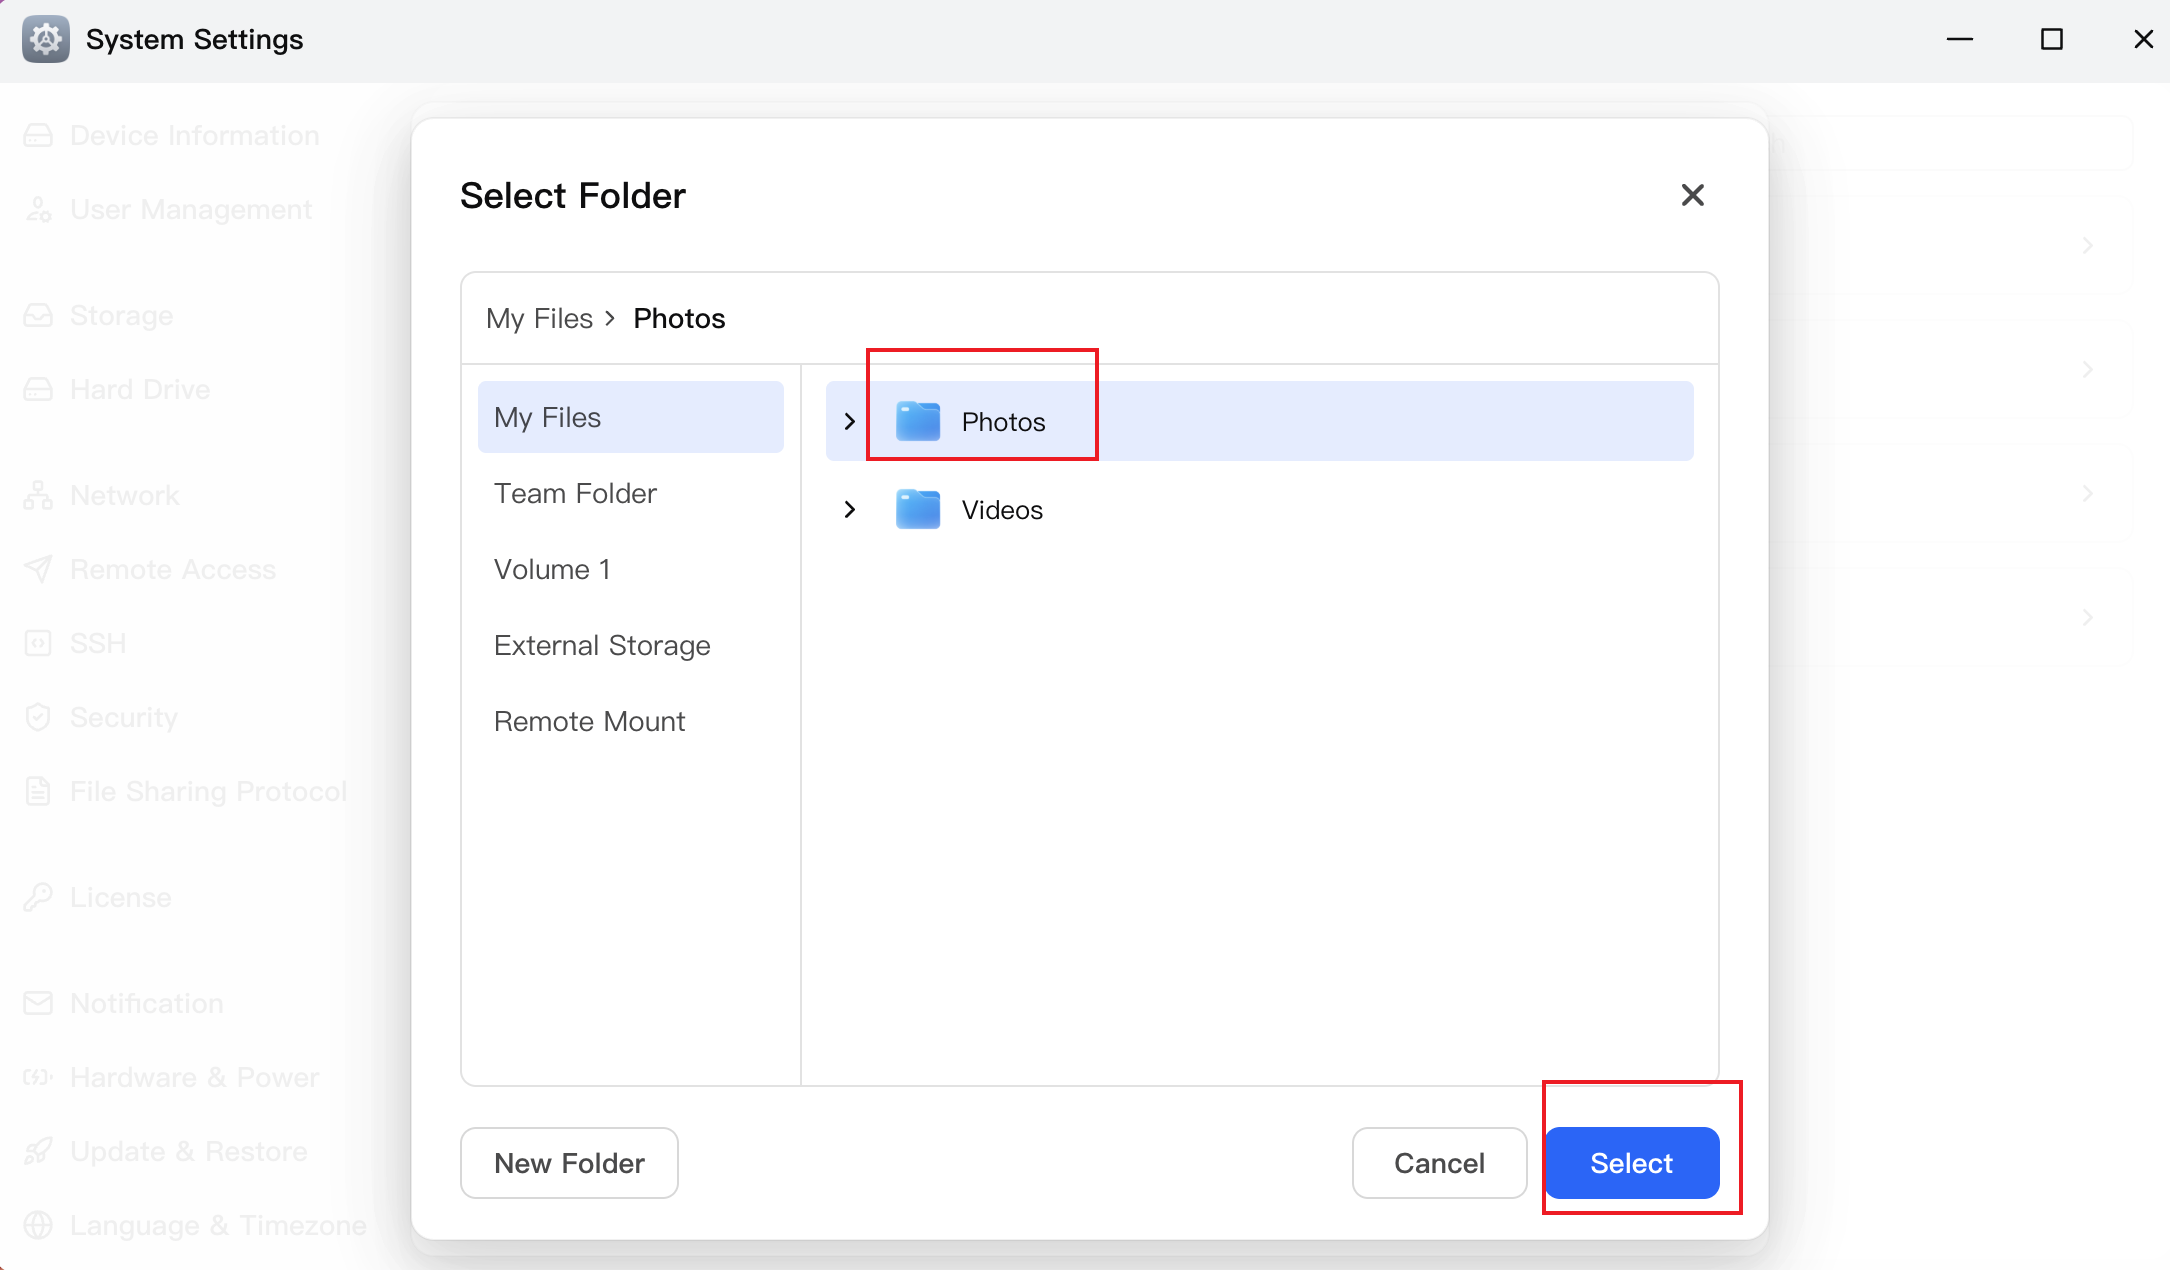
Select your Photos folder.
-
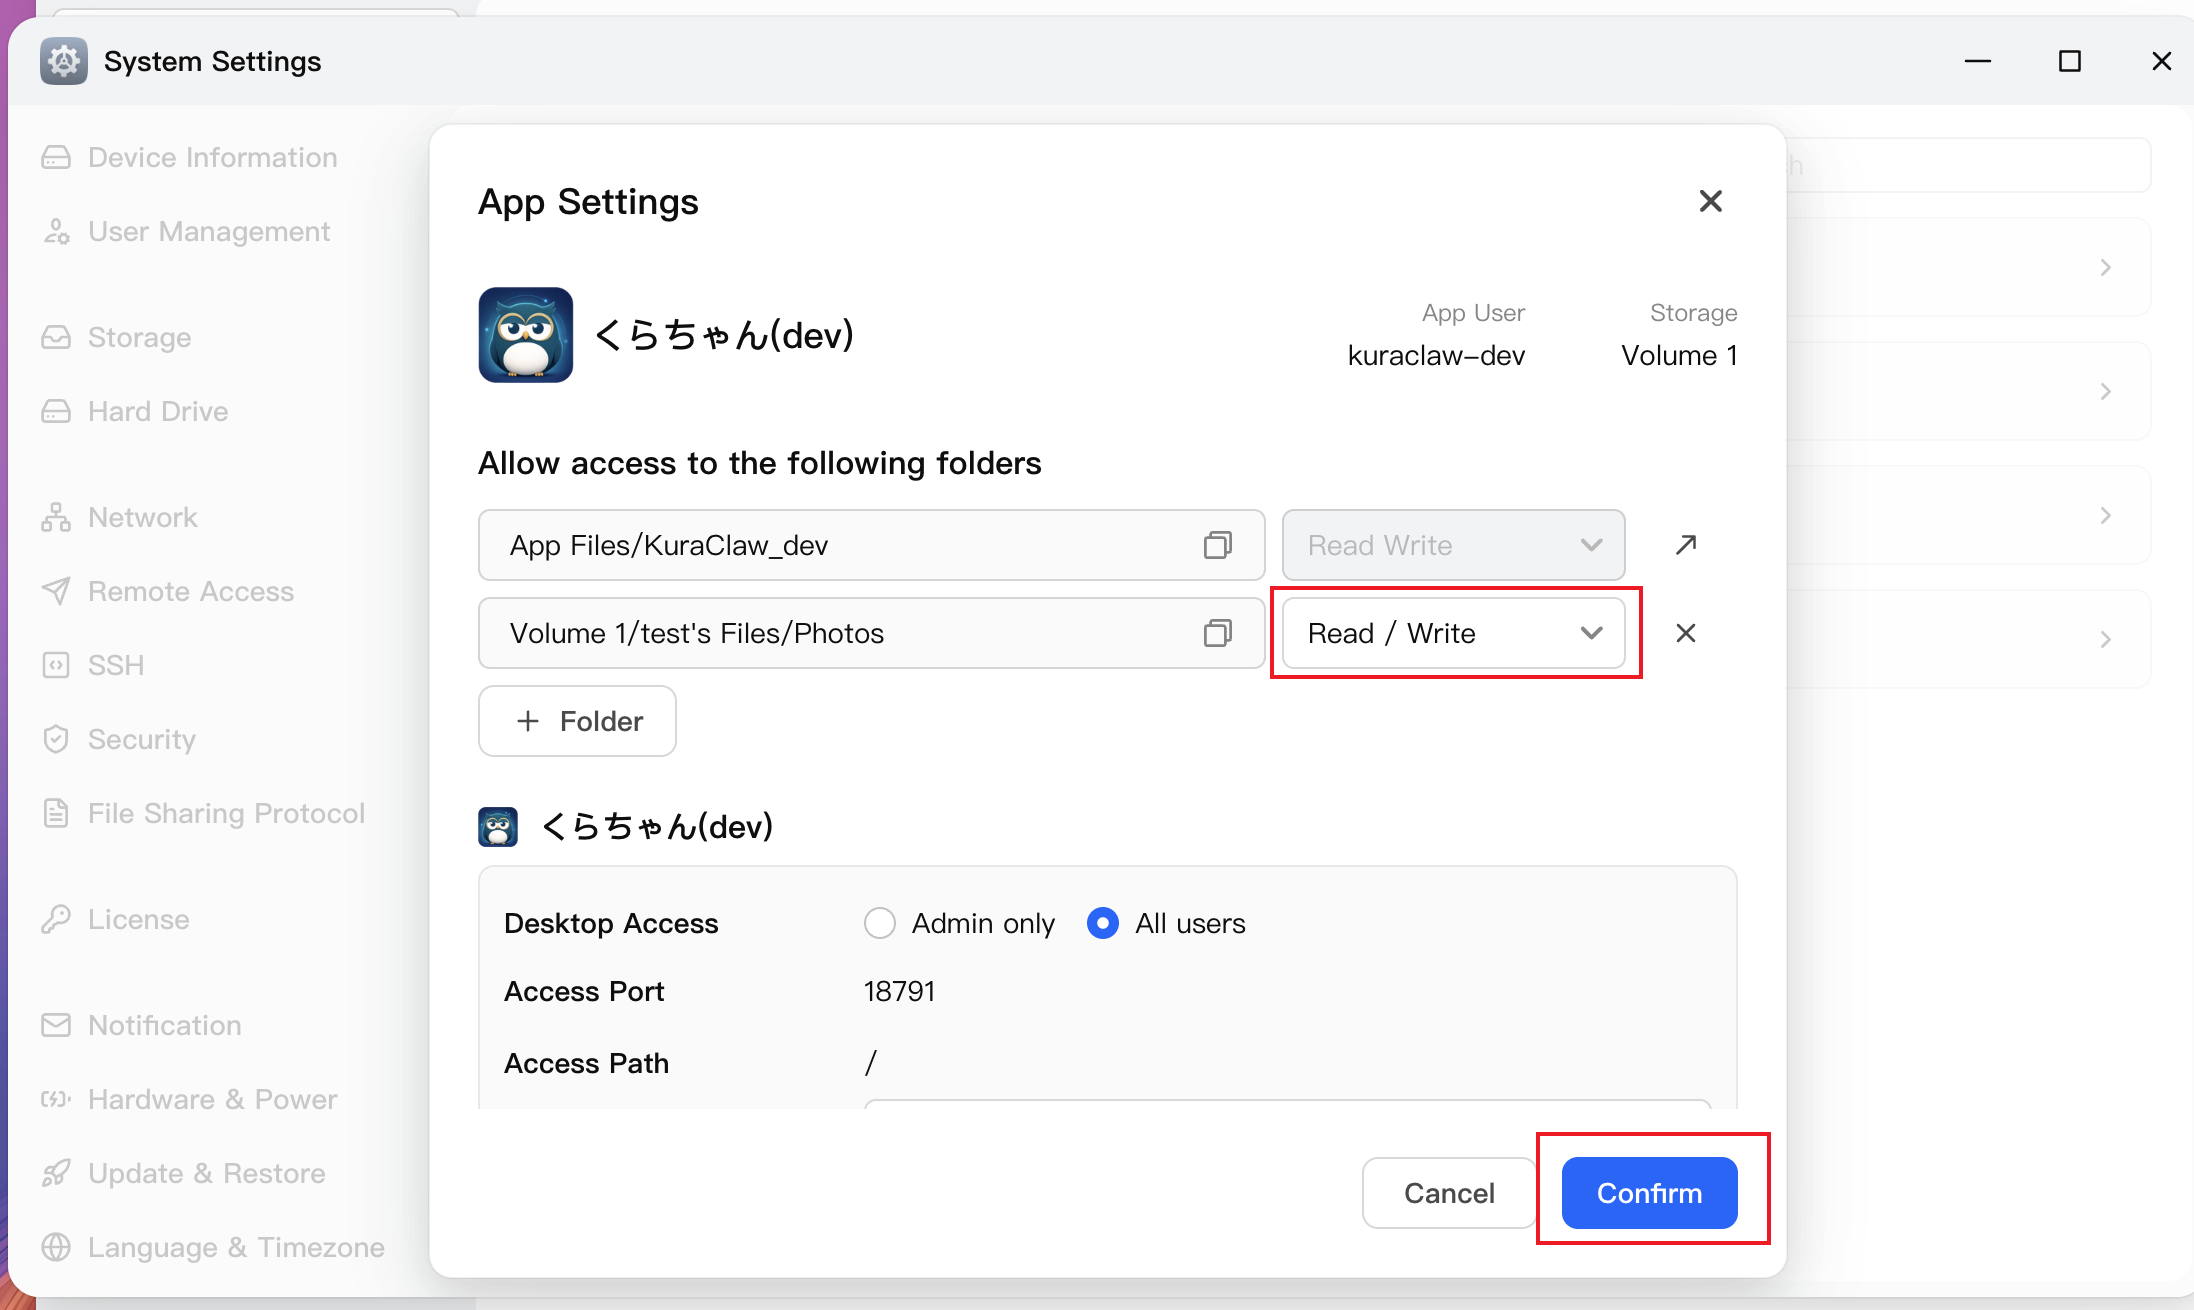
Set the permission to Read/Write and click Confirm.
Kura-chan picks up the change automatically — no restart. Open Photos → Preferences → Photo source to confirm; it shows “Kura-chan can see N photos” once your library is mounted.
Option 2 — Upload from the Kura-chan filesystem
Section titled “Option 2 — Upload from the Kura-chan filesystem”For photos that aren’t in your fygoOS Photos library, drag them into Kura-chan’s Agent Drive. Uploading this way keeps each photo’s original date and location.
Troubleshooting
Section titled “Troubleshooting”- “Kura-chan can see 0 photos” after mounting. The mounted folder must be the one named Photos. Open Photos → Preferences → Photo source → Add or change folders and pick the correct folder.
- New photos aren’t appearing. Mounting is live, but very large libraries take a moment to scan. Give it time, then refresh.
What’s next
Section titled “What’s next”With your photos mounted, you can prepare photos for AI search to search by text, or recognize people.